


February 6, 2015
Whew! It’s been a busy weekend for me! I had fall minis in my hometown of Artesia and while I enjoyed meeting new people and the feeling of fall, I’m wiped out!
If this is your first time jumping into the series, be sure to check out my first three posts on 1) when to find the light 2) finding it in the shade and 3) finding it in the shade with a backlit subject. If you’ve been following my series, awesome! I would be super encouraged if you messaged or emailed me a photo you took while applying one of my tips! I just might post a collection of them if I get a handful. 😉
Here we are, week 4, and we’ve learned that the best time for lighting is 1-2 hours before sunset or after sunrise. Taking this into consideration is very important when shooting in an open field, because the sun can still be harsh just 5-10 minutes before it sets. For example, if I were shooting in an open field, I would shoot all the way to and a few minutes past the Weather Channel app’s estimated sunset time, which today is 6:28. However, if I were shooting near brush and buildings, I might end my session earlier, around 6:15, because the sunlight can be obstructed by the trees/buildings before it sets.
Okay enough rambling..let’s get to this! Keep in mind that for the following, I am assuming there are no clouds blocking the sun, and it’s a bright, sunshiny day!
Step-by-step:
1. Find the sun and put your client’s back toward it. Make sure they are not looking at the sun, because 1) they won’t want to squint looking at the sun! and 2) there could be shadows on their face made my their eyes or nose!
2. Move 45 degrees to the side of them now. If you shoot with the sun coming directly into your camera, it sometimes can make it hard to focus on your clients. So to solve that, move to the left or right 45 degrees and then refocus on your client. The sun rays are no longer coming directly into your camera, though they are still hitting your client’s head. Allowing the sun to come straight into your camera is possible when the sun is closest to setting, because it’s less harsh.
3. Watch that glowing light on the back/side of their head (that we talked about last week!), and make sure the front of their face is evenly exposed without hot spots.
4. Snap away!
Let me show you what I mean by taking Alyssa’s senior session, for example. They wanted to incorporate their super fabulous blue Bronco in her session. So we got to our open desert field in front of the Organ Mountains, but the sun was very bright. The only way to get a picture of the Bronco in front of the Organs was for Alyssa to look straight into the sun. So we go creative! We needed to wait until the sun was lower and softer before we had her facing the sun. So first, we faced the Bronco toward the mountains (we opted to not get the mountains in the first few while we waited). To end our session, we faced it toward the sun (now we had the mountains behind us!) where Alyssa was finally able to look into the diffused sunlight without discomfort. It just took a little patience and creativity in the meantime!
See the differences in the two pictures below? The first is backlit, as I positioned myself at a 45 degree angle from my client and the sun. The second is evenly diffused without backlighting, as she is looking into the sun.
1) We had the Bronco facing toward the mountains, away from the sun, so Alyssa could put her back against it.
2) Instead of shooting directly in front of her, I took 3 giant steps to my right (the right of the bronco) and started shooting! If I had been in front of the Bronco, the sunlight would have been harsh directly into my camera. Instead, I moved to solve that while Alyssa continued to have her head backlit.
3) Notice where the sun hits her head and the exposure on her face. Her face is evenly exposed, and the sun is hitting the side of her head so sweetly.
Next time you find yourself in an open field with bright sunlight, remember to face them away from the sun and take a step or two to the left or right, and shoot at a 45 degrees away from your subject. And good luck! I will be the first to tell you that this light was most difficult for me to understand until I discovered how to position myself in coordination with the sun and my client! Feel free to share any of your tips or experiences with this type of lighting!
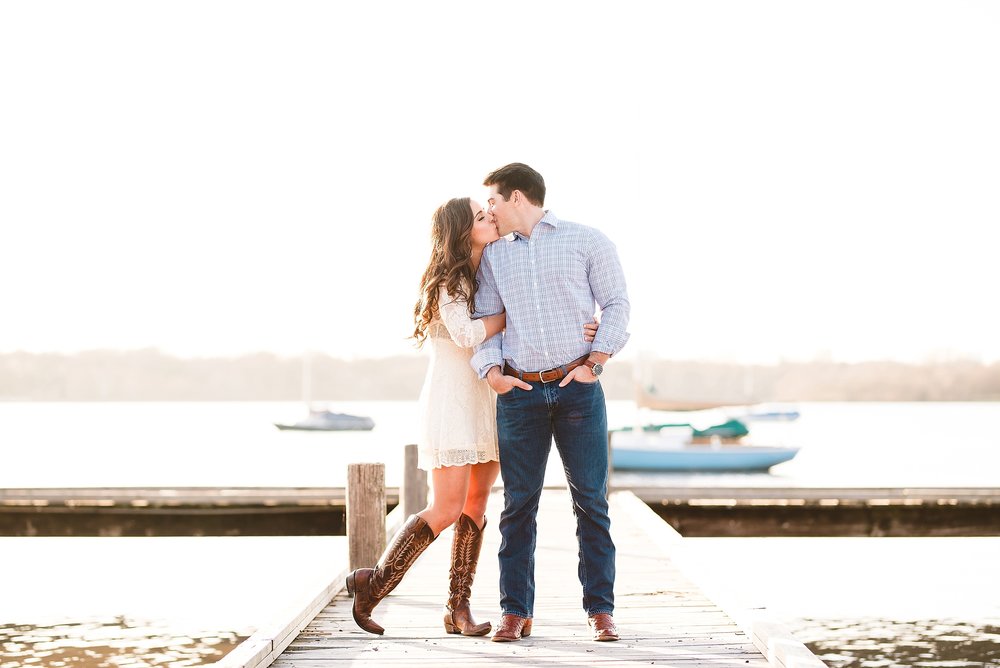
Below is an example where I blocked the bride’s face from harsh lighting by her husband! Both faces were evenly exposed for the picture.
Do: shoot with your client’s back to the sun.
Don’t: face them toward the sun to cause them discomfort.
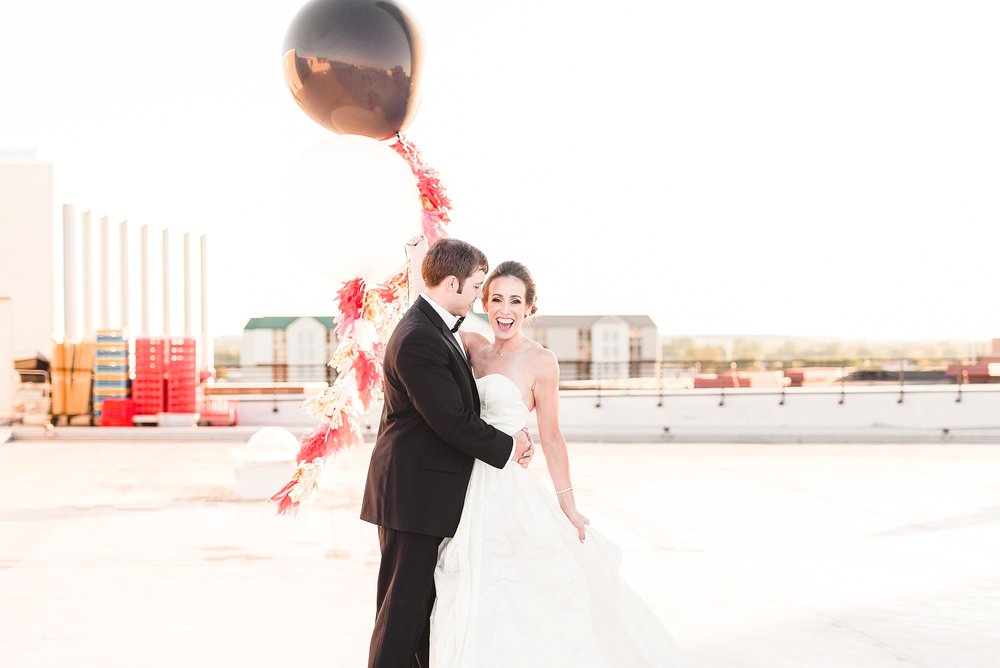
If You Have To: face them toward the sun to get a background they want, then pose them to where they’re kissing each other, looking at each other, or not directly looking into the sun.
Like below: naturally, they wanted a picture of the Organs behind them, but the sun was going to be directly in their eyes. So we improvised with this pose to make it easier on their eyes, yet we still captured the Organs in the background.
Thanks for joining us!
Joys,
Lindsay

Comments