


September 19, 2017
Tip # 3: Avoid posing a subject in direct sunlight.
Did you miss Tip #1? Or the intro to the series?

Well, hello! I’m raising my hand again here! This is something I did when I first started, because I didn’t know how to “find the light”. If you scroll to the bottom, I reveal this quite obviously with you!!
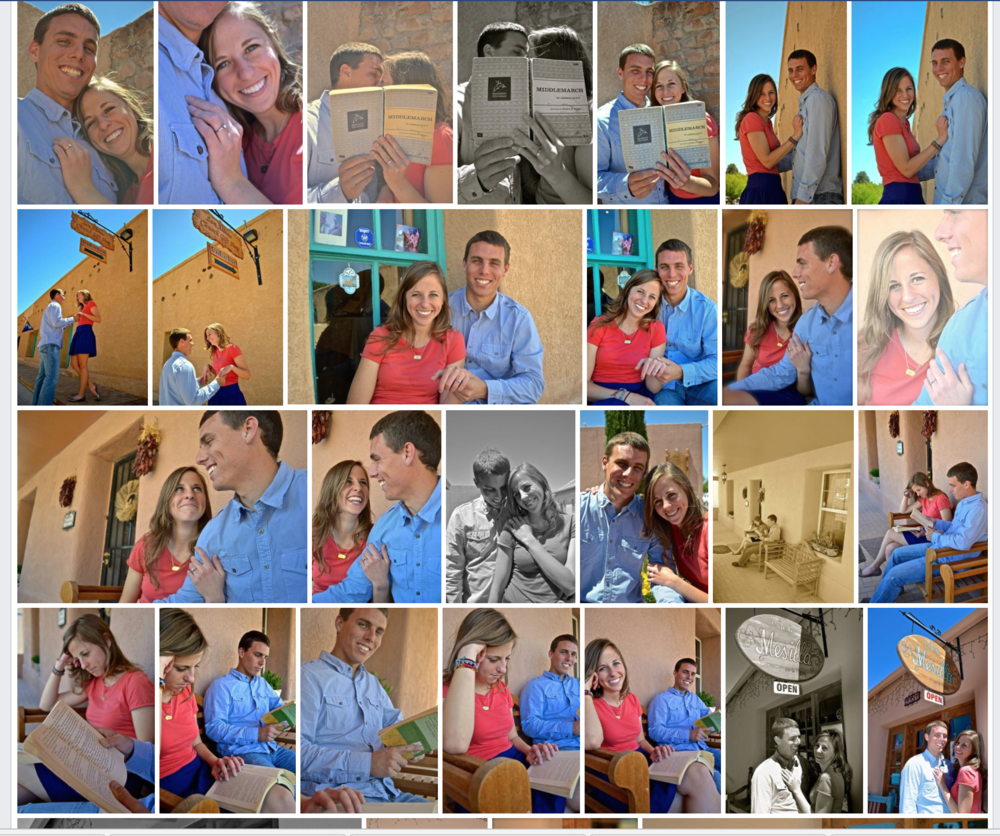
I can remember taking my roommates engagement pictures after church one Sunday afternoon in the, yep, you guessed it, harsh afternoon New Mexico sunlight. I could’ve made this work had I positioned them either in the shade or with their backs to the sun (blocking the sun from coming into my camera—AKA “backlighting”), but I didn’t. I had them looking into the sun, shadows cast on them and the whole 9 yards.

YUP! Notice shadows? And how harsh the light is? I should have turned their backs to the sun so that there was even lighting on their faces, while backlighting them.
But I didn’t know what to look for! My eyes weren’t trained nor was my knowledge sharp.
By avoiding placing your subjects in direct sunlight, you 1) avoid them from becoming too hot 2) reduce their eyes from squinting from looking into the sun 3) avoid harsh shadows and 4) allow for even light on your subject, which is very important. We’re always searching for the best light so that our clients can look and feel the best, as well as, our work look consistent.
To fix this, once you find the light, place your subject’s back toward the sun, allowing them to be “backlit” and have them look at you. You may need to use a tree, your hand or other object to block the sun from coming into your lens, because it will wash out your image (we dive a little deeper in how to do this in The Capture Course). When you block the sun from coming in, you allow for your image/subject to be crisp.
Think about the visor in your car: when the sun is shining through your windshield, it makes it hard to see clearly, so it’s necessary for you to pull down the visor to block the harsh sun for you. It’s a very similar concept as this. Next time you’re in the car and do this, think about the concept! Your eyes are the camera, the visor is your hand (or a tree/object), and the sun—is the same in both scenarios!
You’ve got this! 🙂 Practice finding the light with someone you’re comfortable with before you take a paying client. This will bring you more confidence for when it’s your turn!
xox Lindsay
PS: I’m getting super vulnerable with you to totally prove that ALL of these 15 tips I’m sharing with you…are simply all the mistakes I made with my first sessions! Thank goodness all my roommate Jess could see was how IN LOVE they were in these photos! 😉 You guys, these are STILL on my Facebook! I posted these to my personal FB, because I wasn’t even “official” yet with my LDP Facebook page! I’ll probably share some more to give examples of WHAT NOT TO DO as I look back on my work.
However, don’t forget: you’ve got to start somewhere! For inspiration, read my thoughts on this here.


Comments