


February 12, 2018
When you have heart eyes like the background of your son’s Valentines’ picture…
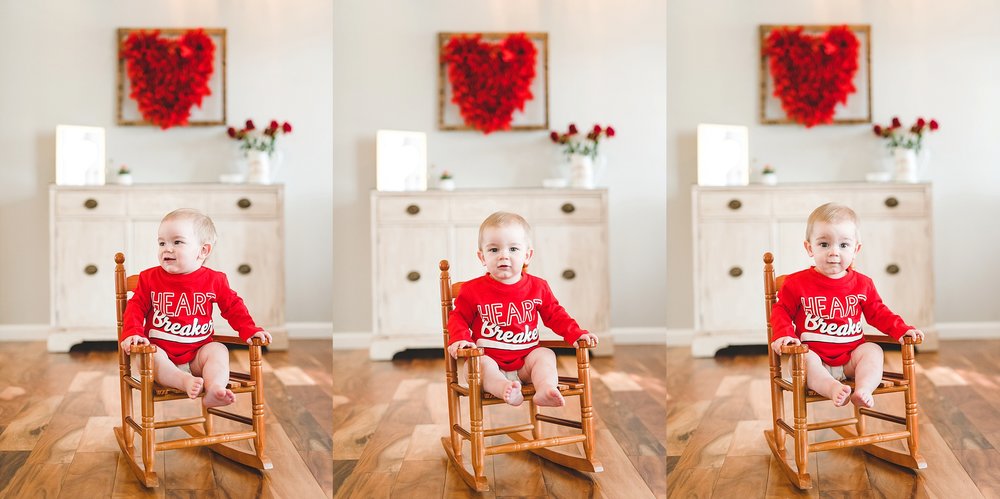 His expressions make me melt.
A couple weeks ago we hosted our 2017 couples in our home, and I handmade this heart decoration. I honestly loved the pop of color it added to our house, and so of course, thought, “Luke would be so cute in front of it!”
If I had planned more extensively, I might have coordinated an outfit that doesn’t have a dirty diaper in it, BUT….I just love it. We’re so casual, and this is my babe at home most of the time anyway!
I’m going to walk you through:
1) how I made the heart decoration
2) how I chose this spot and
3) my camera settings in manual

Step 1
So first things first, purchase red napkins (or pink if you want!), chicken wire and nail pieces of wood together to make the frame–or have your husband do so! I requested my hubby to make a 2 foot x 2 foot frame, and I wouldn’t have minded it being half a foot bigger. My hubby is quite the handyman, so he probably spent more time on the frame and stain than I asked, but I’m so pleased! Always 😉
Anyway, you’ll nail the frame together, staple the chicken wire to the back, and then begin pulling your napkins through. I started with the middle/top of the heart and worked to try to make it as symmetrical as I could. Now, this is the timely part of the craft, so don’t be in a rush! 🙂 You’ll love the finished product! Leave it up in your home and then snap some pictures of your loved ones!
Step 2
First thing is first, you have to know from where your light source is coming. In my case, you can see which side of Luke’s face is brighter, meaning the window from our dining room was on that side, illuminating his face. If he walked much further away or turned his back to the window, his face would be AWAY from the light source and thus, darker. When we’re inside, we want our subjects facing the light source or at a 90-degree angle, like Luke is, if the light isn’t too harsh. I’m going to explain an editing tip in my editing software below to further discuss this!
Secondly, like I had mentioned more in depth in this blog post here, the distance between your background and the subject matters. It’s what adds depth to the photo (as well as your aperture!). So I knew that I wanted to pull Luke forward, away from my desired heart backdrop. I knew that it would draw attention to him with the pop of red and heart bokeh in the background.
Step 3
Okay, so what’s “bokeh”, you ask!? Ah, I’m glad you did! Bokeh is the blurred background that’s achieved when you shoot with a wide, or low aperture. So go ahead, put your camera in manual mode and check to see how low the lens will allow your aperture to go. If you have the kit lens that came with your camera, your aperture is probably limited to a 3.5 f/stop (aperture), which means you’ll get some bokeh but not as pronounced as with an aperture of say, 1.8, 2.0, 2.2 or 2.5. Basically, the lower your aperture, the more room there is for error, BUT the more creamier the background with bokeh!
So to give you an example: I was using my 50 mm 1.4 lens. (Side note: if you only have a kit lens, I HIGHLY recommend buying the nifty fifty–50 mm 1.8 FIRST)
My settings with this lens were set to an ISO of 1250, aperture 2.0 and shutter speed 1/200. If you’ve heard me before, you know I personally don’t love to go below a shutter speed of 1/160, especially with littles in the frame. My ISO was set as high as 1250, because it was later in the afternoon, and we were inside, which means…less light than outside! (keep in mind that depending on your camera, the ISO qualities range–1250 may cause some camera to look grainy; mine can handle!) My aperture was set to 2.0 so that more light could come in (wider hole) AND my background would be more blurred–more bokeh with the heart background!
 Look! Even looks TOES are out of focus! Talk about amazing depth of field–that’s ALL to the low aperture of 2.0!! In contrast, if my aperture was set to something high, like 4.5, 5.0, etc., then the heart would be more in focus, as well as his toes. Make sense?
You can tell in the image above, that I scooted Luke backward toward the heart. In the images above, he was pulled forward a few more feet AND our dining room table was partially blocking the light from the window. When I scooted him backward, closer to the heart but probably 5-6 feet in distance, the light was free to hit his face a little harsher–see his left cheek/the right of the picture. Because it slightly bothered me that one side was brighter than the other, I adjusted it in Lightroom, my editing software. I’m going to show you exactly how I edited these images in a video I recorded below!
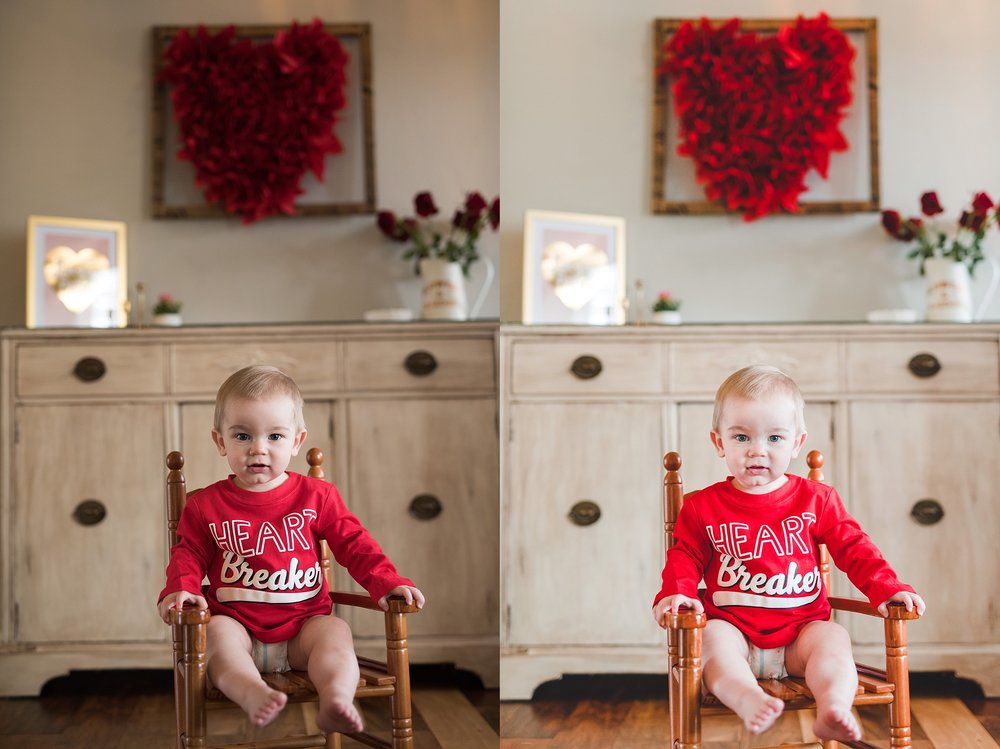 See! Here’s a before and after! You easily tell from which side the light source was coming!
Psssst. The Lightroom video will be available through the end of February 2018…so snatch it fast!
Can’t wait to see what you create, friend! Share your success and creativity when you capture it! I’d love to do a happy dance with you.


Hi Lindsay! This was so SUPER, SUPER helpful! Thank you so much!!!!
Hi Lindsay! This was so SUPER, SUPER helpful! Thank you so much!!!!
Hi Lindsay! This was so SUPER, SUPER helpful! Thank you so much!!!!
Hi Lindsay! This was so SUPER, SUPER helpful! Thank you so much!!!!
Comments